DIY Under The Sea Craft
Create this simple DIY Under The Sea Craft for Children's Art Week
Equipment
- Pair of scissors
- Glue stick
- Paint (we like Paint Pops Paint Sticks)
- Blue card
- Plate (to draw around)
- Bottle top (to draw around)
Instructions
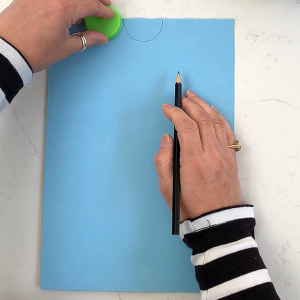
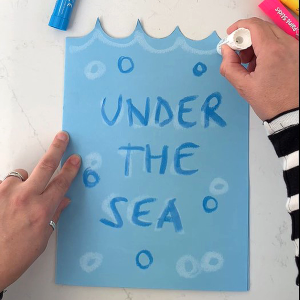
- Take a piece of blue card, fold it in half (book style). Draw circles along the top of the card, using a bottle-top. You can use a compass to do this if you prefer.
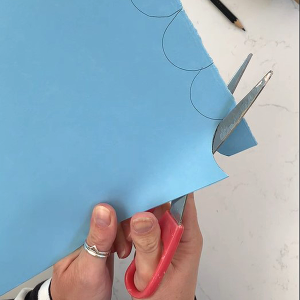
- Cut the circle shapes out to create a wavy edge along the top of your card.
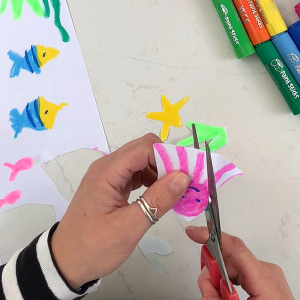
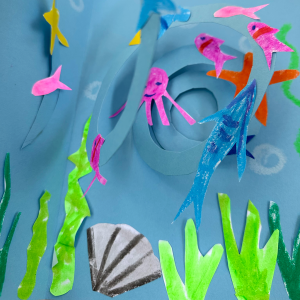
- Draw some aquatic creatures, shells and seaweed on a piece of plain white paper. Make them as bright and bold as possible and really use your imagination.
- Using your scissors, cut the shapes out.
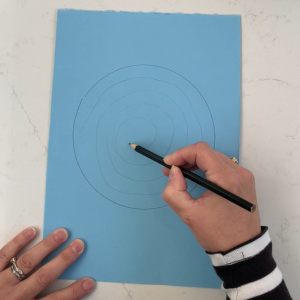
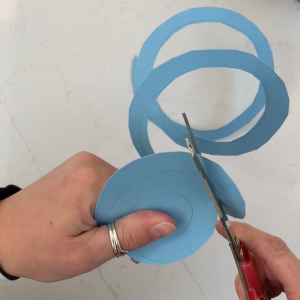
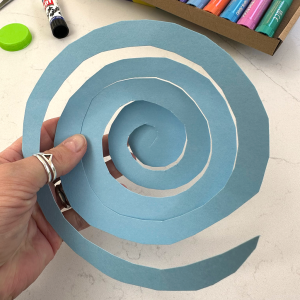
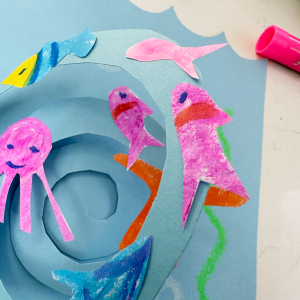
- Draw a circle on another piece of blue card. We used a plate but youcan use a compass to do this if you prefer. Draw a spiral within the circle. This can be freehand.
- Cut the spiral out using your scissors.
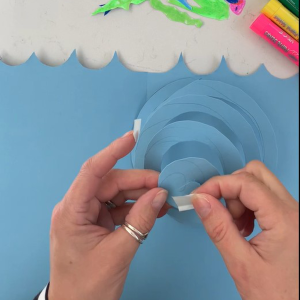
- Add a blob of glue (or a little bit of sticky back tape) to the back of the middle of your spiral.
- And the front of the end of the spiral.
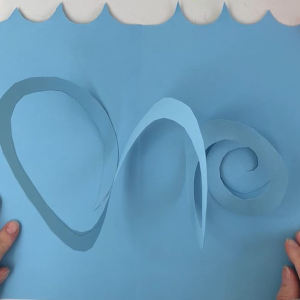
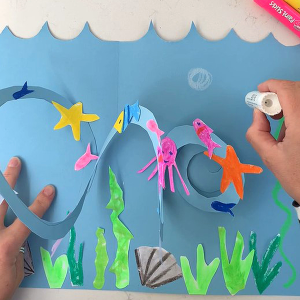
- Pop the spiral inside the middle of your card, close and press down firmly. When you open the card, the middle of the spiral should stick to the back of the card and the end should open with the left-hand edge, to resemble a wave.
- Next, begin sticking your sea creatures onto the 'wave'.
- Continue until you've stuck all of the sea animals on.
- And your seaweed and shells onto the background of the card.
- Write 'under the sea' on the front of your card.
- Draw some bubbles inside the card - et voila! Your under the sea craft is complete!